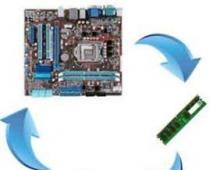
macOS is an advanced and at the same time reliable operating system that many PC users chose instead of Windows 10. Unfortunately, installing the Apple platform on a computer from another manufacturer is not so easy. The easiest and most convenient way is to boot a virtual machine.
Requirements for installing macOS on a Windows PC
To install Mac OS X (10.5 and higher) on a Windows PC, you will need a virtual machine. You can use VMWare, which allows you to run the macOS operating system in a Windows environment. As for hardware requirements, they are as follows:
- 8 GB RAM.
- Intel Core i3, i5 or i7 processor.
- 128 GB hard disk space.
Applications needed to install Mac on Windows PC or laptop
You also need to download the macOS image. The password is “xnohat”.
How to install Mac OS X on Windows
Step 1: Install the latest version of VMWare Workstation.
Step 2. Unpack Unlocker 2.0.8 and run the “win-install.cmd” file as administrator.
Step 3. After launching, you need to wait until the patch is installed and unlocks the ability to install macOS in VMWare. Open VMWare and create a new virtual machine (automatic method). In the window that appears, select “Apple Mac OS X.” In the Version list, select Mac OS X 10.7 or any newer version.
Step 4: After clicking the “Next” button, the virtual machine will be created. In order for macOS to work properly, you need to configure the hardware. To do this, select “Edit Virtual Machine Settings”.
Step 5: Click the "Add" button, then click "Next" twice and select "Use an Existing Virtual Disk" and click "Next" again. Now select the operating system image you downloaded earlier and click “Finish”.
Step 6: After completing all the settings, click on the blue launch button and follow the on-screen instructions to install OS X.
Personal computers of the Macintosh brand, produced from 1984 to 2000, are one of the brightest pages in the history of information technology. Created by the genius of Jeff Raskin - who wanted to make the computer simple, accessible and all-in-one, and therefore as homey as possible - and named after its author's favorite variety of apples, the Mac and its younger brothers - Macintosh II, Macintosh LC, Quadra, Performa and others - they were distinguished by a graphical user interface that was unusual for that time and gained popularity both among these latter and among the developers who released many interesting gaming products for Apple home PCs. Now anyone can get acquainted with them - thanks to the presence of several multi-platform emulators, which we will tell you about.
FAQ
I have never used Apple computers in my life. Is it difficult to figure everything out there?
In fact, it’s not even difficult - everything is planned and implemented in an extremely visual and quite obvious way. When home users of the first IBM PCs were still learning the syntax of manually entered DOS console commands, Macintosh owners were already busy using the mouse in graphical interface windows. It was the latter who invented it, however, not Apple at all - but that’s another question.
What are these files in the archives with Mac games? How to open them?
The archives with Mac games that you can find on our website may contain different types of files, both standard and quite exotic, with the following extensions:
- ISO (TOAST) is a disk image format (for games released on CD), standard for both Mac and other platforms. The easiest way to open it is by connecting it as a separate disk in the emulator settings or by mounting it in a virtual drive (for example, using "Daemon Tools"). Please note that when mounting a disk, you will not be able to see its contents in a Windows environment - to access it you will have to use emulators such as "Basilisk II" or "SheepShaver" (preferably the latest versions).
- BIN/CUE (MDF/MDS, CCD/IMG/SUB, NRG, MDX) - alternative CD image files, typically used in cases of combination discs (which combine computer data with AudioCD music tracks). You won't be able to connect the disk in the emulator settings - you will need to mount the image in a virtual drive (for example, using "Daemon Tools") and use the "Basilisk II" or "SheepShaver" emulators (preferably their latest versions).
- DMG is an archived CD image file adopted as a standard on the Mac OS X platform. Like previous formats, it can be mounted using “Daemon Tools” (although it is not listed among those officially supported by this program: when connecting, we do not look at “All types of images” , and "All files").
- DSK (IMG, IMAGE) - floppy disk image - usually original: one of the most common options for old games. Opening it in emulators is quite simple - by moving it with the mouse into the program window ("drag&drop"), or by connecting it as a separate disk in the emulator settings.

- Folder with files - in rare cases, the author of the game provides not an archive or image, but a ready-made version of it - it is recommended to use this rather in the "Executor" interpreter.
I launched the game - but all the commands in the menu are indicated by a strange ⌘ symbol. What kind of animal is this? I don't have this on my keyboard...
This is a symbol of the "command" key, which was (and still is) located on most Apple keyboards to the left (and then to the right) of the spacebar. In emulators, its function is performed by the "Alt" key - that is, for example, the standard command to exit the program ⌘Q should be understood as simultaneously pressing the "Alt" and "q" keys.
Why do you need four emulators at once? How can I choose the one that is most suitable for running the game I'm interested in?
In fact, there are many more emulators for the Mac platform: these are beyond the scope of our guide. PearPC, SoftMac, GrayBox, Fusion... Nevertheless, we have chosen for you the four most functional and easy-to-use options - as a rule, each of them turns out to be more preferable for running programs designed for a particular software or hardware environment. You can choose the optimal emulator for a particular game using the links in its description or using the “technical information” on the “files” page, as well as the following brief examples of running several games in the four main emulators we recommend (and in particular, the listed advantages and disadvantages of each of these methods).
I read this guide, but I still don’t understand - which emulator is better to use? Can you say this very briefly?
- If the game requirements indicate a PowerPC-based computer or OS 8.5 or higher, there is only one option: “SheepShaver”.
- If the game requires a color monitor and/or system 7 or higher, try "Basilisk II" first. If you cannot achieve the expected result, contact "SheepShaver".
- If the game uses black and white graphics and/or is designed for system 6 and lower, we recommend the "Mini vMac".
- If the game is distributed in the form of ready-made program files or you are not happy with the prospect of using ROM images of unknown origin, then your option is "Executor".
I have 64-bit Windows - and the SheepShaver emulator does not detect the drive of a real computer.
You need to run the latest versions of the "Basilisk II" and "SheepShaver" emulators - 2015 (and when using our assemblies - through SheepShaver_2015.bat), since only the 2015 version added support for CD-ROM detection on these systems.
The 2015 version of SheepShaver crashes when launched on a 64-bit system. What should I do?
To solve this problem, you need to specify on the “Memory” tab the amount of RAM available to the emulated Mac (“RAM size”) of at least 295 MB - for example, 512 MB - otherwise the emulator will crash.
Can all Macintosh games be played on modern emulators?
Unfortunately no. Not a single Mac emulator yet allows you to run games that necessarily require a 3D video card. To date, however, only one old Macintosh exclusive game with such system requirements is known - WaterRace.
Examples of running games in various emulators
Running any program on an old Apple computer is, in fact, not easy, but very simple. As an example, we will take several games of different genres and ages - such as the puzzle game "The Fool's Errand", the board game "Nemesis Master Go Deluxe", the adventure game "Evocation: La Sfida" and the action game "Marathon".
Executor
The simplest and officially recommended method by many authors is due to the fact that, strictly speaking, this is not an emulator, but an interpreter. It does not virtualize any software environment and does not pretend to be an ancient computer device, but simply translates Mac program commands into Windows language - like the most popular interpreter of old games ScummVM. It would probably be the best option, but its development has been stopped for quite a few years; as compensation, "Executor", which once cost money, is now freely available.
Therefore, the first step is to download this program from our website (2.7 MB) and install it on your Windows. When launched, the installer also offers to install several demo versions and even paid additional programs on the disk - we will not need the latter, and the choice of the former is a matter of taste. However, we recommend installing a trial version of Stuffit to unpack *.sit files and other specifically “Apple” archives.

After installation, run executor.exe - always “as administrator” (in Windows 7 and later). Don’t be alarmed by the program’s registration window that appears: its heavy shareware past is taking its toll. Enter your name and serial number 99991004 and the key n9rk57f369byp:

After registration, we launch the program again, but before enjoying the purchase, call up the settings window by pressing the keys Alt-Shift-5- and install everything, according to the picture kindly provided by the author of "The Fool's Errand" Cliff Johnson:
Click "Save" and return to the main "Executor" window. A convenient feature of this interpreter is full access to our entire PC - when you click on the “boxes” icon in the upper left, all our disks are displayed in the top line.
"The Fool's Errand"
You can find on one of the displayed disks of our PC the game files, unzipped from the folder of the same name for this emulator, but you can do it in another way: add the unpacked game files directly to the APPS subdirectory located in the Executor folder (naming, for example, the corresponding new folder " Fool"). As a result, it will appear in the left panel:

We open it with the usual double click - and we see four files. As stated in the “User Guide” for the game, the “Prologue” and “Finale” icons are used to view the introductory and final videos, respectively, and “The Fool’s Errand” is used to launch the Jester’s own adventures.

In the game you can use all standard commands - both from the menu and using keyboard shortcuts (the unusual ⌘ key, whose icon is displayed in front of the letters in menu items, is duplicated on the Windows keyboard with the "Alt" key). For example, to exit the game you need to press Alt-Q, etc.

Advantages of running the game using "Executor":
- comparative simplicity - files are launched directly from our hard drive;
- lack of emulation - there is no need to obtain proprietary ROM files in complex ways.
Disadvantages of running the game using "Executor":
- some graphical and other bugs (for example, the game does not display the “Mac” icon at the top left); Freezes are possible in games for which the author provides official patches;
- when launched in full screen mode, the program may not work correctly;
- Some games lack music or sound effects.
Mini vMac
Now let's try the simplest, but still full-fledged emulator. To run this kind of program, you need to get a suitable ROM file, which is quite difficult to do legally: you need to cleverly extract it from an old Macintosh Plus you have on hand. However, in all emulator assemblies that can be downloaded on our website, this file is already attached, as is the hard disk image. Therefore, we download the archive and extract the folder from it MINIVMAC with file minivmac.bat. The latter is designed to automatically connect a hard drive with a pre-installed system Mac OS System 7.0.1- however, for our first game we won’t need one.
"The Fool's Errand"
Run the file directly " mini vmac.exe" from the emulator folder.
![]()
The question mark indicates that we do not have an operating system installed. However, such old games as "The Fool's Errand" can be launched without a hard drive, which makes things much simpler. Just click on the image files of the original floppy disks from the archive with the game - the game.image And the show.image- and transfer them to the Mini vMac window - after which they are automatically mounted along with the system.

The Mini vMac menu is quite unique - it is called up by holding down the Ctrl key; for example, the list of available commands can be seen by Ctrl-H, and an alternative "drag&drop" way to open disks is Ctrl-O.

Since the game discs are original, the method of launching it corresponds in almost all respects to that specified in the User's Guide. To view the introductory video, double click on " prologue - finale"from the second disc, the game itself - double click on the icon" the fool's errand"or by save file, which - due to the lack of hard drive emulation in this version - is placed on the same game floppy disk. Finally, after completing the game, the "show finale" icon will appear there, giving access to the final video. During the game, exactly you can also use the main menu and the keyboard shortcut with “Alt” instead of the original ⌘ - but now both the branded “Macintosh” icon and the option to turn on the sound are in their rightful places.

The last thing a user who is not familiar with original Apple computers should know: to exit the emulator, you must first turn off our virtual machine - using the "Shut Down" command in the "Special" menu - and then close the program with the Ctrl-Q command.

"Nemesis Master Go Deluxe"
Let's now try a slightly more complicated case - using a game that requires a hard drive with an operating system. To do this, we launch our emulator using the file minivmac.bat. In front of us is a desktop screen with several available menu items and an active disk icon at the top right.

Now transfer the unzipped image of the floppy disk with the game ("nemesisgomaster_4_3.dsk") to the emulator window by holding it with the mouse - or opening it from the menu using the Ctrl-O command. The floppy disk with the game was not only successfully mounted, but also opened its folder for us:


Finally, let us once again remind a user who is not familiar with original Apple computers that to exit the emulator, you must first turn off our virtual machine - using the "Shut Down" command in the "Special" menu - and then close the entire program by pressing Ctrl-Q .
Advantages of running the game using "Mini vMac":
- The easiest to use program for mounting a disk using the "drag&drop" method;
- Perhaps the only authentic way to run the oldest games in the “native” resolution of 512x342 and even with support for sound, which disappeared from System 7 and beyond.
Disadvantages of running the game using "Mini vMac":
- launch is possible only in windowed mode - although you can enlarge the game window (Ctrl-M) or switch to full screen display (Ctrl-F), but not without impressive black fields;
- suitable only for the oldest and black-and-white games: fortunately, the ones we took as examples are just one of them.
Basilisk II
Now let's take on a much more serious opensource emulator, capable of simulating more powerful machines from the early to mid-1990s. On our website you can download a program assembly with a prepared ROM file and a disk image with pre-installed System 7.5.5 OS - which all together turns out to be perhaps the most universal launch method, suitable for the vast majority of old games for the Mac platform. A certain nuance is the presence of different versions of "Basilisk II": the older ones, as a rule, are much more stable, but the presence in the latest (2015) versions of the emulator of such functions as, for example, access to a real (or virtual) CD-ROM drive on 64 -bit mother systems are forced to put up with the possibility of periodic crashes, especially frequent in the case of insufficient RAM.
"Nemesis Master Go Deluxe"
Let's try to run the board game in Go again. The game does not require a CD, so the old, proven version of "Basilisk II" will suffice. However, the "drag&drop" method for attaching a floppy disk image does not work in this emulator. Therefore, we open the editor of its settings by running the file basiliskii_setup.exe- and on the “Disk” tab we add the floppy disk we need to the list of those available in the emulated environment: click “Browse” - and find the unzipped image of the floppy disk with the game (“nemesisgomaster_4_3.dsk”).

Editing other settings is not necessary - although, of course, you can always customize the desired appearance of the program to suit you. For example, select the “Direct X (Fullscreen)” mode in the “Screen type” section on the “Screen” tab to see the emulator displayed in full screen; For some other games, you will also need to set the exact color mode (for example, "256 colors").
As an alternative to running the settings program, you can always manually edit the file " basiliskii_prefs", writing there the path to the floppy disk image (at the very top, after the mounted system hard drive, for example, with the line " disk D:\Games\NemesisGoMaster_4_3.dsk"), and the required graphics mode, and much more, which you can find out about in the detailed help about this emulator.
You can launch the emulator itself either from Setup by pressing the F1 key or clicking on the “Run” button, or directly using the executable file basiliskii.exe. In any case, after the loading screen with a greeting from Mac OS, we will see the desktop of a virtual computer with an open game disk.

Now we can enjoy the game in full accordance with its “User Guide”: read the brief help by double-clicking on the “Read Me First” file (windows of this kind are closed by clicking on the square at the top left), solve any of the bonus problems in the " folder Tactical Problems", launch the standard game mode via the "NEMESIS™ Go + Joseki + Tactics" icon, etc. Of course, you can also use all the features of the game menu by replacing the ⌘ icon with the "Alt" key.

Finally, it is worth remembering that turning off the emulator by closing its window is highly not recommended - to exit, you should use the “Shut Down” command in the “Special” menu, after which “Basilisk II” will close automatically.

"Evocation: La Sfida"
Black and white "Nemesis Master Go Deluxe" looks no worse, if not better, in this emulator than in the more appropriate Mini vMac - however, how can you not take advantage of all the color capabilities of "Basilisk II"? So let's launch such an interesting exclusive as the Italian adventure game "Evocation: La Sfida". It is distributed in a *.sit archive, so to open this file in the emulator you will need to perform several extra steps. Perhaps the easiest way is to make it see the real disks of the main PC. To do this, let's go to the settings program and on the "My Computer" tab, enable the "Enable external file system" option, and at the same time check the box next to the hard drive we need.

By launching the emulator - either directly from Setup by pressing the F1 key or clicking on the "Run" button, or through the executable file basiliskii.exe - we will see that our computer icon now appears under the system disk.

We open the disk we just connected by double-clicking on this icon, find the unzipped file with the game in the desired folder - in this case, we need "evocation1thechallenge.sit" (as an even more convenient alternative, you can place the file we need in advance in the "Virtual Desktop" directory \Desktop Folder" in the emulator folder). The fact that our virtual Macintosh is quite capable of such archives is hinted at by the “Stuffit Expander” icon on the desktop - fortunately, to unpack it you just need to activate the corresponding file by double-clicking the mouse - and the “Evocation La Sfida” folder will appear on the disk. .

By holding down the left mouse button, we transfer this folder to our desktop - the windows of the previously opened disks of our real PC can be closed by clicking on the square at the top left. Now let's open the newly created folder and see two help text files (in Italian and English) and two subdirectories (with color and black and white versions of the game). Of course, we are more interested in the first option.

Therefore, double-click the "Evocation" icon from the "Evocation La Sfida (Color)" folder, on the title screen of the game that appears, check that the desired language is selected ("Italiano" or "UK English") - and start the adventure by clicking on the "EVOCATION" cracker FINAL" at the top of the screen.

You can exit the game by clicking - as in all Mac programs - on the square at the top left, but our entire virtual computer is turned off by using the "Shut Down" command in the "Special" menu.
Advantages of running the game using "Basilisk II":
- a universal program suitable for most games designed to run on Macintosh computers equipped with a color monitor and System 7 OS;
Disadvantages of running the game using "Basilisk II":
- the need to obtain a ROM file through (illegal) means;
- Operational stability is not the highest: periodic crashes are possible, especially with the latest versions of the program and low amounts of memory;
SheepShaver
The last Macintosh emulator we recommend is a kind of offshoot of "Basilisk II", designed to simulate a PC based on PowerPC (Power Macintosh) processors. The latter were produced in parallel with “regular” machines equipped with CPUs of the 680x0 family from Motorola, but starting from 1997-1998. new versions of the Apple operating system (Mac OS 8.5 and higher) were supported only by these computers. Accordingly, this emulator is designed to run both standard Mac games (based on this, almost everything we said about “Basilisk II” applies to it), as well as exclusives for PowerPC and their more recent operating systems. The downside of such omnivorousness is some instability - especially on the latest (2015) versions of the program, which add support for CDs and 64-bit mother systems.
"Marathon"
Let's consider perhaps the most difficult case: a game that requires connecting a CD-ROM to play music from an AudioCD. Of course, you can simply download the official (and free) port of this action movie called “Aleph One,” which is also available for modern Windows, but real old gamers don’t look for easy ways, right? Therefore, from the archives downloaded from our website, we extract both the folder with the emulator assembly and the disk images (marathon.bin and marathon.cue) with accompanying files (marathon_crack.sit and marathon_serial.txt). First of all, we mount the image in a program familiar to our main OS (for example, “Daemon Tools”). Next, go to the emulator folder and run the settings program (sheepshaver_setup.bat or sheepshaver_setup.exe in the Sheep folder). On the CD tab, enable the "CD-ROM enabled" option and use the arrow to move our virtual drive from the "Available" window to the "Installed" window.

On the "Memory" tab, we indicate the amount of RAM available to our Mac ("RAM size") at 512 MB in order to avoid possible program crashes. On the "My Computer" tab, check the "Enable external file system" checkbox and select the hard drive we need (on which you can find the unzipped marathon_crack.sit file - as an even more convenient alternative, you can simply place this file in the "Virtual Desktop\Desktop Folder" directory " in the emulator folder). Now we launch the latest version of the emulator using sheepshaver_2015.bat or sheepshaver-20150301.exe in the Sheep folder. If everything went well, then after a brief greeting we are greeted by a desktop with icons of both one of the HDDs of our mother PC (“Computer”) and the CD with the game (“Marathon CD”).

Now you can double-click first the “Marathon CD”, and then - if you don’t want to read the lines “Read Me!” - the folder "Marathon f" and the launch icon "Marathon 1.2". However, this is an authentic launch method - so be prepared to enter the serial number from the registration card included with the game (or from the file attached to our archive - for example, BVC2K6DG6Z348GBT).

After this, the game will finally be able to launch - but we will still take a different route, especially since this way it will not be possible to turn on in-game music. Therefore, firstly, close the game window and the “Marathon f” folder window and, holding down the left mouse button, copy this folder from the CD to the desktop. Secondly, by opening “Computer” with the real hard drive of our PC and with the marathon_crack.sit file (or finding it on the desktop), move this file to the same already copied “Marathon f” folder. Thirdly, double click on marathon_crack.sit - and we have two new unpacked files. Now we launch the game using the “Marathon 1.2. 1” icon.

After the splash screen, open the settings menu ("Preferences") and be sure to check the "Background music" checkbox. It is also recommended to set the desired difficulty level, configure the control keys and window size (with the value "100%", in contrast to "Fullscreen", part of the game screen will be occupied by health indicators and other interface details).

By clicking "OK", we go to the main menu and launch "Begin New Game". The game comes with full musical accompaniment - you can exit it by pressing Alt-Q. It is worth recalling that our virtual Mac is turned off with the “Shut Down” command in the “Special” menu.

Advantages of running the game using "SheepShaver":
- the only way to run a number of games designed for the PowerMac architecture or on Mac OS Classic 8 and 9, which is most often quite suitable for games that prefer the classic System 7;
- rich customization capabilities, which, however, require some knowledge and skills.
Disadvantages of running the game using "SheepShaver":
- the need to obtain a ROM file through (illegal) means;
- stability of operation is not the highest, even in comparison with "Basilisk II": periodic crashes are possible, especially with recent versions of the program and low amounts of RAM;
- launching a number of games may require fine tuning of both the emulator itself and the virtual computer - in terms of color, screen resolution, memory size, etc.
When switching from Windows to Mac OS, perhaps the most common first thought is - how will I live without my favorite Windows programs?
There are a sufficient number of ways to solve this issue and this is good news! Each method is good in its own way and there are both paid and free methods. First, you should decide whether you really want to use Win programs under Mac OS? Perhaps now you think so, but over time, I assure you, Windows Windows against the Mac OS will seem miserable to you and the search for alternatives will begin in order to move away from the Windows system as quickly as possible and forget it like a terrible glitchy dream.
Well, while you still don’t have such thoughts and a certain feeling of uncertainty in the selection of alternatives remains, let’s look at one of the good options for launching programs for Windows under Mac OS.
Let's take a little look at the options for Windows emulation and together we'll figure out which option is solved by the utility in the review
- Boot Camp- installs Windows as the second operating system and does not allow you to use two operating systems at the same time. This method is good because Windows uses all the computer’s resources to the maximum, in particular, it makes it possible to play.
- Installation of Windows/Linux etc virtual machines... This method allows you to run Windows in a separate window or organize it as a separate desktop. This method is good because we can use several OSes at the same time and even switch to Unity mode, which allows you to open Windows programs like regular Mac OS programs, i.e. you will have open programs on the screen, without the Windows desktop. This method is quite good and is suitable for owners of powerful computers. The disadvantages include the inability to install “heavy” 3D games, because The emulator does not fully support your video card. Also, the disadvantages of this method include the excessive space occupied by the emulated system and the “eating up” of a certain percentage of your computer resources (RAM, processor).
- Installation of Windows emulators. This option is the most optimal if you need to constantly run some kind of non-resource-intensive program, for which there are no alternatives for Mac OS, although today emulators allow you to run “heavy” 3D games (but I have not tested this). Emulators are good because for each program they create a kind of “bottle” in which the program itself is located, as well as vital files for launching it. This method allows you to significantly save space and resources on your computer.
Today we will introduce you to the third option “Installing emulators in Windows”(later and everyone else).
There are options for paid and free emulators. Free ones usually require a lot of fiddling and figuring out how to use them. In paid ones, it all comes down to simple mouse clicks.
One of these emulators is CrossOver ($60) and is considered the best tool today!
The first huge plus of the program is support for the Russian language. You will not have any difficulties using the program and now I will show and tell you everything.
The program does not have outstanding interfaces (outwardly it reminds me of the good old one), because... You know what its main task is. After installing and launching the program in the system menu we see:

Let's try to take any example program, for example the VKMusic program for Windows. Download the installation file VKMusic_4.45.exe

Next, in the system menu, select “Configure” and “Install software”

This window opens. There is a lot in the list of supported programs. You can bother and pay attention to it. Even if the program you want to install is not in the list, you will still install it and it will work, but for this it is important to scroll down the list and in the " tab Unsupported applications" choose " Other Application"

Next, go to the “Select an installer” section.

I think comments here will be unnecessary. We simply indicate the path to the program installation file, in our case VKMusic_4.45.exe in the Finder.

pay attention to the label exe file, it is in the form of the CrossOver logo. In fact, to install the program, you could immediately click on it and it would automatically install, however, my task is to introduce you to the program so that you can navigate it.

So, you have selected the installation file. Now you can safely press the “Install” button in the very bottom right corner and CrossOver will create separate bottle and will install it into it. However! Before installation, you have the opportunity to select the axis under which the program runs (xp, win2000, etc.), as well as rename the bottle itself. To do this, go to the section “Select a bottle into which to install”

Here you choose which OS your program runs under and enter the name of the bottle.
If you have installed games before and want to store them in one bottle, then select a ready-made bottle with the game and program installed.
Is it better to create new bottles or keep everything in one?
when creating a bottle, as I wrote above, vital system files from Windows are added to it. Of course, a program that takes up 12 MB will weigh 300 megabytes, due to the added system files. If you create new bottles, they will waste the disk space of your HDD, but again, these are all minor things. I prefer not to bother and create new ones every time, so that later I can delete the unnecessary ones with peace of mind.
And here is the installation process itself:

1. A bottle is created

2. The program installation starts in the same way as on Windows. I didn’t recognize the coding of Russian words, no big deal.

Just install it like a regular Windows program. the path in this case is inside the bottle itself, there is no point in changing it.

Ready.
Now we try to run the installed Windows program: 
That's all love is.
P.S
1. A shortcut to the installed Windows program is also added to “Mission Control” Mac OS and looks like a normal Mac OS application: 
2. if you need to manually change the internal program files in the boot, for example, transfer game saves to the program folder or something else, this is done simply: 

3. Where does CrossOver store bottles? 

4. Is it possible to install programs that do not have an installation?
Possible!


The settings in the next window are quite important. Click on the Customize button, which is located at the bottom left.
If you have an AMD processor:
- Select the AMD option under System.
If you have an Intel processor:
- All Updates are selected at the top.
- In the Bootloaders combo box, select newest Chamelion.
- In the Kernels combo box, select Legacy Kernel.
Then click Done and continue installation using the Install button. To speed up installation, select Skip at the disk check stage.
After the message “Installation finished” and the reboot timer appear, press Right Ctrl. Then select Devices in the top toolbar of Virtual Box, click CD/DVD Devices and select Unmount CD/DVD Device. Then go to Machine and click on Reset. After that, you will see the chameleon bootloader and OS X loading.
Once the download is complete, you will see the OS X Settings screen! You are one step away from success. However, I found a small pitfall that the virtualization only works on one core. Maybe it's because of the distribution, maybe not. Other problems that have not yet been resolved are the sound not working and the inability to change the display resolution. However, in all other respects this is a full-fledged virtual computer on Mac OS X!

Addition
There are some solutions regarding audio and resolution.
To change the resolution, open Finder and select the OS X drive on the left. Open the Extras directory. Right click on com.Apple.Boot.plist and open it in TextEdit. At the very beginning, insert the following:
or any other suitable resolution. Select "Save as" and save to your desktop by unchecking the Unicode box and choosing the name com.apple.boot.plist. After that, drag this icon from your desktop into the extras directory, overwriting the original file, entering the password if prompted.
Do not install system updates. If you need updates, you need another ISO image that already has the updates installed. If you install updates directly from Apple, they will conflict with special patches and the Chameleon bootloader. This is just a warning.
And for those of you who are having difficulty booting, try a different version of Chameleon or a different OS kernel. Sometimes it helps. If you are experiencing USB related errors, try disabling USB in the VirtualBox settings and see the result.
Free mac emulator for windows
Sometimes you want to try some new operating system to get a practical impression. I've done this more than once, for example. LifeHacker recently wrote about running a Mac OS X emulator on Windows. Why not look at the Mac first and then criticize or praise it with reason? In turn, for better understanding, I translate the article from English.
We have already seen how to run Snow Leopard in VMWare. But the VMWare virtual machine is a paid one; instead, you can use the free VirtualBox. In addition to the virtual machine itself, we also need an ISO image of OSX86. The Hazard group has posted a well configured Snow Leopard installer, just search for it on Google. Of course, if you think that downloading a pirated image will have a bad effect on your karma, then there is nothing stopping you from buying it.
Once you have both the virtual machine and the image, install Virtual Box, launch this emulator and select New in the top left of the toolbar.
In the dialog box that appears, select the settings as in the following picture and click Next.
In the next window, select the RAM size. Most likely, 1024MB will be more than enough.
After clicking Next, create the virtual disk. A dynamic disk size of 20GB will be quite enough. A dynamic type virtual disk does not take up extra space on your hard drive, but is slightly inferior in performance to a static virtual disk. For us this is not significant. Click Next.
A window will appear with summary information about the virtual machine being created. Click Finish.
Now select the virtual machine settings from the Settings option on the toolbar.
In the window that appears, remove the Enable EFI option.
In the same dialog box, select Storage. Click on the word Empty next to the virtual DVD drive.
Then click on the green plus icon located at the bottom of this window. In the dialog that opens, select the OSX86 ISO image that you downloaded earlier and click OK.
Now in the main VirtualBox window, click the Start button (located on the left).
At the command prompt that appears, type -v and press enter. This is necessary for detailed diagnostics if something goes wrong. Next, the download will continue and you should see a screen with a choice of language. Select your language and click Next. If, for some reason, the mouse does not respond to movement, use the keyboard shortcut Right-Ctrl-I. Click Continue and Agree. Then launch Disk Utility by going to Utilities in the menu.
On this screen, select 20GB VBOX HARDDISK. Click the Erase tab, enter OSX in the Name field and click the Erase button. The disk preparation process will not take much time. When finished, select Disk Utility from the menu and click on Quit. This will take you back to the installer, where you select the disk you just created and click Continue.
Hello Khabrovsk residents. Recently I needed to write in Objective C under Mac OS X. My hardware is not the most suitable for all kinds of assemblies, and religion does not allow me to sit completely in this OS. I decided to install Mac OS X on a Qemu virtual machine in Linux.
Here's a list of everything I used:
-Gentoo Linux 64 bit
-Qemu 0.10.5
-KVM (Kernel-based Virtual Machine) 88-r1
-KVM support in the Linux kernel
-Processor supporting Intel Virtualization Technology(in my case it's Core2Duo E6400)
-Linux kernel>=2.6.20
-Assembly Mac OS X iATKOS v7 (Leopard 10.5.7)
Let's move on to configuration, you need to add KVM in the kernel. Download the sources, unpack, launch make menuconfig:
Processor type and features->Paravirtualized guest support
We note:
-KVM paravirtualized clock
-KVM Guest support
-Paravirtualization layer for spinlocks
Next, a new Virtualization option appears in the kernel settings root
Let's go there and note:
-Kernel-based Virtual Machine (KVM) support
-KVM for Intel processors support
-KVM trace support
-PCI driver for virtio devices
-Virtio balloon driver
We assemble, install, and reboot with the new kernel.
Now install Qemu with KVM support, and KVM itself
USE="kvm" emerge qemu
emerge kvm
Now let's move on to shamanism with a virtual machine.
Create a virtual hard disk:
qemu-img create -f raw macos.disk 30G
If we are going to run Qemu not as root, we need to give rights to other users to read/write to the device /dev/kvm:
chmod 0666 /dev/kvm
Let's launch:
kvm -boot d -hda macos.disk -m 900 -net nic,model=rtl8139 -net tap -usb -no-reboot -no-shutdown -vga std -cpu core2duo -cdrom 10.5.7.iso
-hda path to our virtual hard disk
-cdrom let to the image
-no-shutdown -no-reboot necessary so that in case of an error the emulator window “freezes” and the error can be read
-net nic,model=rtl8139 emulate a Realtek 8139 network card
-net tap In order for the guest system to see the host network over the network, a TAP device is needed
-m 900 amount of memory allocated to the guest system
-boot d boot from seedrom
-usb USB support
-cpu core2duo Core2Duo processor emulation
Loading the disk. We mark the hard drive using Disk Utility(select from the menu above).
Setting up drivers.
Before you press the button Install pay attention to the button Customize
Things we need to choose:
x86 ACPI
Disabler
OHR
Remove TyMCE
CardBus
USB
Intel SATA/IDE
Kernels
Apple PS/2
Can be installed. We wait about 30 minutes.
Mac OS X is installed, setting up.
Now in the launch line we change -boot d to -boot c to boot from the hard drive.
Loading up. Now we need to come up with something with the network.
Searching on the Internet PCGenRTL8139Ethernet.kext, install it, very easy to install using the kextinstaller program. While there is no network, the necessary files can be transferred to the system via a flash drive, for example, add -hdb /dev/sdb(path to the flash drive device)
Reboot the guest OS.
Now for the network to work in Mac OS X, you need to go to network management, select the Ethernet device, turn it off (Off), and then turn it on and configure the desired IP (for example, 192.168.1.1), and configure the tap0 device in the hosting system:
ifconfig tap0 192.168.1.2
- In contact with 0
- Google+ 0
- OK 0
- Facebook 0