Sometimes on Android smartphones you may encounter a problem: opening "Gallery", but all the images disappeared from it. We want to tell you what to do in such cases.
The reasons for such a failure can be divided into two groups: software and hardware. The first is cache corruption. "Galleries", the action of malicious applications, violation of the file system of a memory card or internal storage. The second is damage to memory devices.
The first thing you need to find out is whether there are photos on the memory card or internal storage. To do this, you need to connect either a memory card to the computer (for example, through a special card reader), or a phone if the images from the built-in storage have disappeared. If the photos are recognized on your computer, then you are most likely experiencing a software glitch. If there are no pictures or problems occur during connection (for example, Windows suggests formatting the drive), then the problem is hardware. Luckily, in most cases you will be able to get your images back.
Method 1: Clear the Gallery cache
Due to the peculiarities of Android, the gallery cache may fail, as a result of which photos are not displayed on the system, although they are recognized and opened when connected to a computer. When faced with this type of problem, do the following:
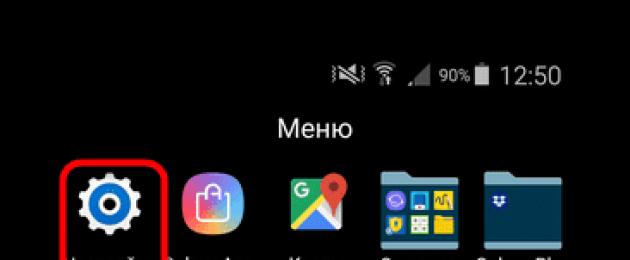
- Open "Settings" in any possible way.
- Go to general settings and look for the item "Applications" or "Application Manager".
- Go to the tab "All" or similar in meaning, and find the application among the system ones "Gallery". Tap on it to go to the details page.
- Find the “Cache” mark on the page. Depending on the number of images on the device, the cache can occupy from 100 MB to 2 GB or more. Click the button "Clear". Then - "Clear data".
- After clearing the gallery cache, go back to the general list of applications in the manager and find "Media storage". Go to the properties page of this application and also clear its cache and data.
- Restart your smartphone or tablet.


If the problem was a gallery failure, then after these steps it will disappear. If this does not happen, read on.
Method 2: Delete .nomedia files
Sometimes, due to the actions of viruses or the carelessness of the user himself, files called .nomedia may appear in photo directories. This file migrated to Android with the Linux kernel and represents service data that prevents the file system from indexing multimedia content in the directory where they are located. Simply put, photos (and videos and music) from the folder in which the file is .nomedia, will not be displayed in the gallery. To return the photos to their place, this file must be deleted. This can be done, for example, using Total Commander.
- After installing Total Commander, log into the application. Call up the menu by pressing the three dots or the corresponding key. In the pop-up menu, tap on " Settings...".
- In the settings, check the box next to "Hidden files/folders".
- Then visit your photos folder. Typically this is a directory called "DCIM".
- The specific folder with photos depends on many factors: firmware, Android version, the camera used, etc. But as a rule, photos are stored in directories with names "100ANDRO", "Camera" or right in the very "DCIM".
- Let's say photos have disappeared from the folder "Camera". Let's go into it. Total Commander algorithms place system and service files above all others in the directory during standard display, so that the presence .nomedia can be noticed immediately.

Press and hold it to bring up the context menu. To delete a file, select "Delete".
Confirm deletion. - Also check other folders where photos may be located (for example, a download directory, messenger folders or social network clients). If they also have .nomedia, remove it using the method described in the previous step.
- Reboot your device.


After reboot, go to "Gallery" and check if the photos are restored. If nothing has changed, read on.
Method 3: Photo Recovery
If Methods 1 and 2 did not help you, we can conclude that the essence of the problem lies in the drive itself. Regardless of the reasons for its occurrence, it will no longer be possible to do without file recovery. The details of the procedure are described in the article below, so we will not dwell on them in detail.
Conclusion
As we can see, the disappearance of photographs from "Galleries" There is no reason to panic at all: in most cases it will be possible to return them.
Agree that it is very convenient when all images, including photos, are stored in one place and there is always easy access to them. However, it happens that it becomes impossible to enter the gallery. Why this can happen and how to open a file on - we will talk about this in our article.
Why is a gallery needed and why it may not open
A Xiaomi phone has a special folder for storing video files and images - a gallery, where by default all the user’s photos are sent, as well as pictures that you downloaded from the Internet.
In most cases, the application cannot be accessed due to the built-in security system. The blocking occurs due to the lack of required permissions to ensure the correct functioning of the application.
Usually, with this problem, when you try to enter the “Gallery”, notifications about lack of permission pop up.
The gallery is closed, there are no necessary permissions: how to open
To correct the situation you need to:

How to hide an album in the gallery
The application displays all albums, including system ones, that contain images, which can make it difficult to find the desired image. To do this, the MIUI shell provides a function for hiding individual folders. To complete this operation you will need:
- Go to the “Gallery” and select “Albums”;
- Select the folder that you want to make invisible and hold your finger on it until the drop-down menu appears. In it, click the “Make invisible” button.

How to open hidden photos
To display an album, you need to go to “Settings”, select “System applications”, and then the “Gallery” section, where you enable the “Invisible albums” item.

The second, simpler option, in the “Gallery” application itself, click on the menu (three dots in the upper corner) and turn on the item that allows you to see hidden albums.
Regardless of the method used, after execution, hidden folders will be highlighted in gray. To give them the status of “visible” objects, you must also hold your finger on the desired folder and select “Show” or “Unhide” in the menu that appears.
To make it easier to view and search for photos, the Android operating system provides a special storage area - a gallery. There are all the pictures and video files on your smartphone. However, there are situations when, when you want to view the footage, a message appears: an error has occurred in the gallery application. Let's look at the causes of the failure and how to fix it.
What could be causing the problem?
The main reason for this problem is the lack of space on the phone. Moreover this applies not only to internal storage, but also to RAM. The system cannot analyze the created photos, which is why the phone writes that there was an error in the gallery application. This is especially true for large video files shot on a high-quality camera. Sometimes such recordings can take up several gigabytes of memory.
There are also a number of other reasons, such as:
- Failure of the memory card or internal storage. Here it is possible to fix the problem only in a service center, or by replacing the SD card yourself.
- Operating system failure. The main factors are the appearance of errors in various programs and services.
- applications. We are talking not only about the software in question, but about all the programs available on the device.
As it became clear, there are several ways to fix the error, detailed instructions for which are presented below.
What to do if an error occurs in the gallery application on your Android phone
The principle of action in this situation is quite simple. You'll be lucky if you can avoid resetting your phone to its original settings. But as practice shows, in most cases, simply clearing the cache and rebooting the device is enough. Let's look in more detail at what to do if there is an error in the gallery.
Resetting the application cache

This method is familiar to every user who has ever cleaned a smartphone of excess debris. For convenience, we suggest using step-by-step instructions:
- Let's go to settings.
- Open the menu with all applications.
- Now you need to find the program from the list " Gallery" For convenience, it is recommended to use the search by entering the appropriate query in the line.
- Next, go to the page with the utility. Depending on the version of Android, you are prompted to press the buttons: “ Clear cache" or " Clear data" Finally, confirm the operation with the “ OK».
Full reset

Let us note right away that the method will definitely work in any situation. However, you should understand that all files stored in the system memory will be completely deleted from the Android phone. Therefore, before starting the reset, it is recommended that all folders. So, below are step-by-step instructions for returning the device to factory settings:
- Let's launch the settings.
- Go to the section " Advanced settings».
- Select the item “ Recovery and reset».
- Now scroll down to the “ Reset».
- Next, click the button of the same name, then confirm the operation with the “OK” button.
After this, the phone should turn off and then reboot.
Please note that the operating system may take longer to start up than usual.

Google Play now has many programs that can replace the standard photo and video storage. Most of them are completely free and do not take up much memory space. This method is only suitable if the failure does not interfere with daily work.
The software allows synchronize Pictures with camera app and gallery. You can also try to delete the standard photo storage, but for this it is advisable to have root rights.
Video instruction
Answers to popular questions
Why does the error only appear when launching the gallery?
The smartphone system makes a request to the database, but seeing problems with a certain file displays a failure message.
What's the easiest way to fix the problem?
If a failure is detected, you should immediately restart your smartphone. In most cases, this action helps.
As you can see, there are several methods for eliminating errors in the gallery application. Each solution to the problem has its own advantages and disadvantages. It must be remembered that it is advisable to reset the settings to factory settings only as a last resort, when the previous methods do not help.
“Camera” Android users have a question - what is causing this problem? Is the problem with the camera or is it a system glitch? Maybe this error only happened with the application? To sort this out, let's look at troubleshooting methods that will allow you to find out why it occurred and directly remove it.
The camera error can be solved both by software and hardware
Often, most problems with the operation of programs on devices are solved by simply rebooting the system, so do it and try taking a photo again. Did not work out? Then you should move on to other ways to troubleshoot the problem.
Wipe the lens and make sure that it is not damaged externally, there is no dirt or cracks. If this does not help, we will fix the problem differently, but you will now be sure that the camera is safe and sound.
Cleaning the application
To correct incorrect operation, you often need to clear the data and cache, which is done using the following steps:
- Go to Android system settings.
- Find the Camera program and in the menu that appears, first stop it.
- Then click on the “Clear cache” button. After the process is completed, select the “Erase data” function in the same menu.
- Launch the camera again.
![]()
Safe mode check
You can find out if the camera is working by changing the mode on the device. To do this, do the following:
- Enable Safe Mode.
- Try to start the camera - if it works, then the reason lies in one of the other installed programs, which does not allow it to function correctly.
- One by one, turn off other components that are simultaneously turned on on your tablet or smartphone.
- When you find the program that is interfering with your camera, remove it.

Check for updates
Android applications are improved and updated quite often. In many cases, users do not have time or are simply in no hurry to install them. But while some programs can work successfully in the previous version, some stop functioning completely until you update them.

Therefore, check if you need to install a newer version of the camera. If this doesn't help, try other troubleshooting methods.
Antivirus scanning
Malicious programs try to get onto Android at the first opportunity. And in most cases, if they succeed, problems immediately occur with the launch of individual applications. Download an antivirus, and if you don’t have it, check the entire system for malware and clean your equipment. After the verification process is completed, launch the camera again, check if all functions are available for use.

Factory reset
Failures in the system lead to incorrect operation of the equipment. Sometimes to restore you need to reset to factory settings. This is done as follows:
- Go to System Settings.
- Open the Backup & Reset menu.
- In the window that appears, select the “Reset settings” function - you will see a warning that all data will be deleted, after which the system will perform in accordance with the factory settings.

There is another way to set the initial settings of the device: enter the combination *2767*3855# in the number entry window, after entering the system will return to the factory settings without additional requests.
If the photo and video application still does not work or Android displays a message that an error has occurred, you can simply install an alternative camera program - this is quite simple, since the Google Play Market has a large selection of different applications. You can install any of them, focusing on your own preferences.
If you downloaded and installed another utility, but it still did not start working, this means that the camera is still faulty. In such a situation, the best solution would be to take your device to a service center so that they can find out what the cause of the malfunction is. Most likely, you either need to reflash the equipment or repair the part itself.
Whatever the case may be, use all the above tips to fix the camera error problem on Android to find out what is the reason and get it working again.
- In contact with 0
- Google+ 0
- OK 0
- Facebook 0